Let’s take a minute to be honest with ourselves. After we have poured all of our heart into building our beloved product, the sheer thought of implementing billing payments & subscriptions becomes a deflating low. It’s a moment when we realize we still have to stumble our way through figuring out how to get all that comes with accepting payments and attributing upgrades to our users. There are few people in this world who look forward to writing this code.
Today you can now integrate your Stripe Subscriptions with one plugin declaration in StarbaseDB and one URL in your frontend project. No need to worry about creating database tables or relationships. You don’t have to implement webhook listener routes. Literally just create your subscription product in Stripe, link to it from your frontend project, instantiate the plugin in Starbase and deploy. Less than 5 minutes, zero drops of blood or tears shed, and your first payment can be on the way to your bank account.
4242 4242 4242 4242 when prompted for a credit card in test mode checkout.Step 1: Create a Stripe Product
Before a user can even begin to checkout on your website you need to create a Product for them to checkout with. In the Stripe dashboard you only need to fill out a short form of details about your product that you’ll see in a screenshot below. First things first, let’s go to the Product Catalog in our Stripe account.
Visit: https://dashboard.stripe.com/test/products
Note – For test mode the /test path is included, for production webhook setup this should be omitted from the URL.

Your screen will likely look different than mine above (perhaps no products listed yet).
Click “+ Create product”
Fill out the form with Name & Description
Select “Recurring”
Put in the amount to be charged
Select how often that amount should be charged (e.g. “Monthly”)
Click “Add product”
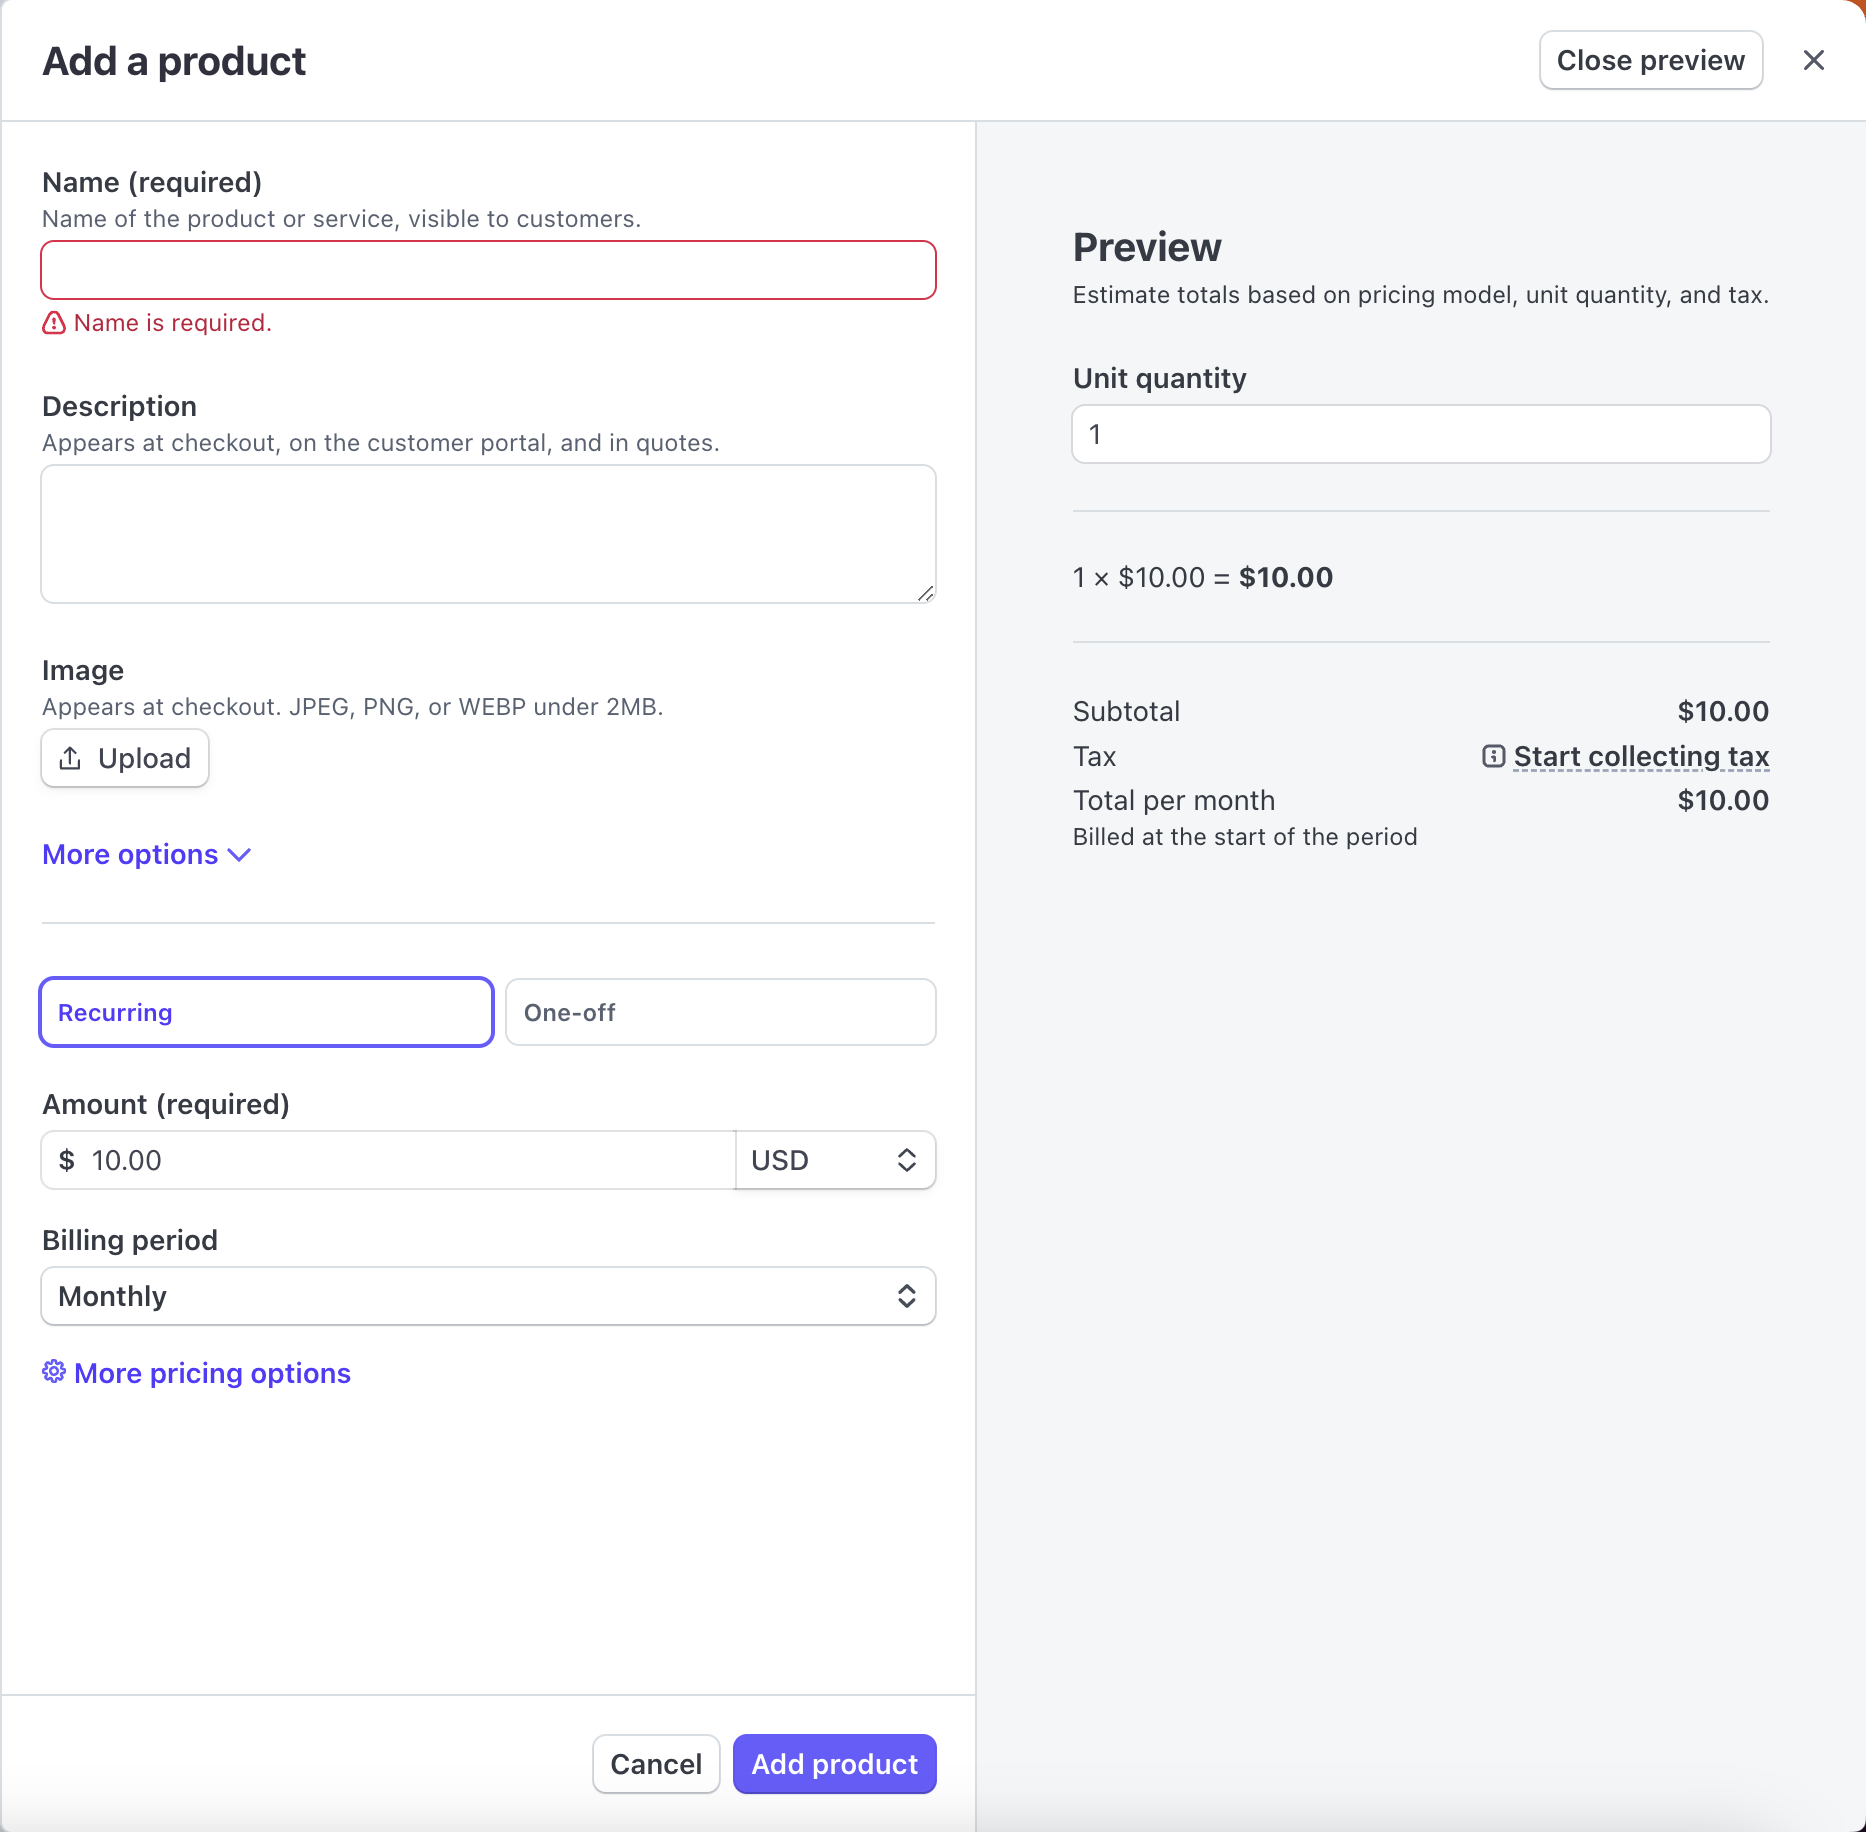
Now we have a product in Stripe that’s ready to begin accepting payments for. In the next steps we will see how we can use this product to make it available to our users in a more direct way (such as presenting it in our frontend project) and verifying that successful payments are accounted for in our database.
Step 2: Setup Webhook in Stripe Dashboard
When purchases or cancellations are made by our users, or perhaps manually by ourselves in the Stripe dashboard, we need to make sure that the latest subscription information is reflected in our database. One terrible situation many products early on find themselves in is a customer has unsubscribed from their service but their database hasn’t reflected that change and is still offering them an upgraded experience. Webhooks allow Stripe to send notice when particular sets of events happen to a destination we define.
With the StarbaseDB plugin all the webhook logic and exposed routes are already ready to go without any additional effort on your end. All we need to do is tell Stripe where to send these events to.
Visit: https://dashboard.stripe.com/test/webhooks
Note – For test mode the /test path is included, for production webhook setup this should be omitted from the URL.
Click “+ Add endpoint”
Your Endpoint URL will be https://starbasedb.YOUR-IDENTIFIER.workers.dev/stripe/webhook
Click “+ Select events” for us to listen to
Add
customer.subscription.deletedAdd
checkout.session.completedClick “Add endpoint”
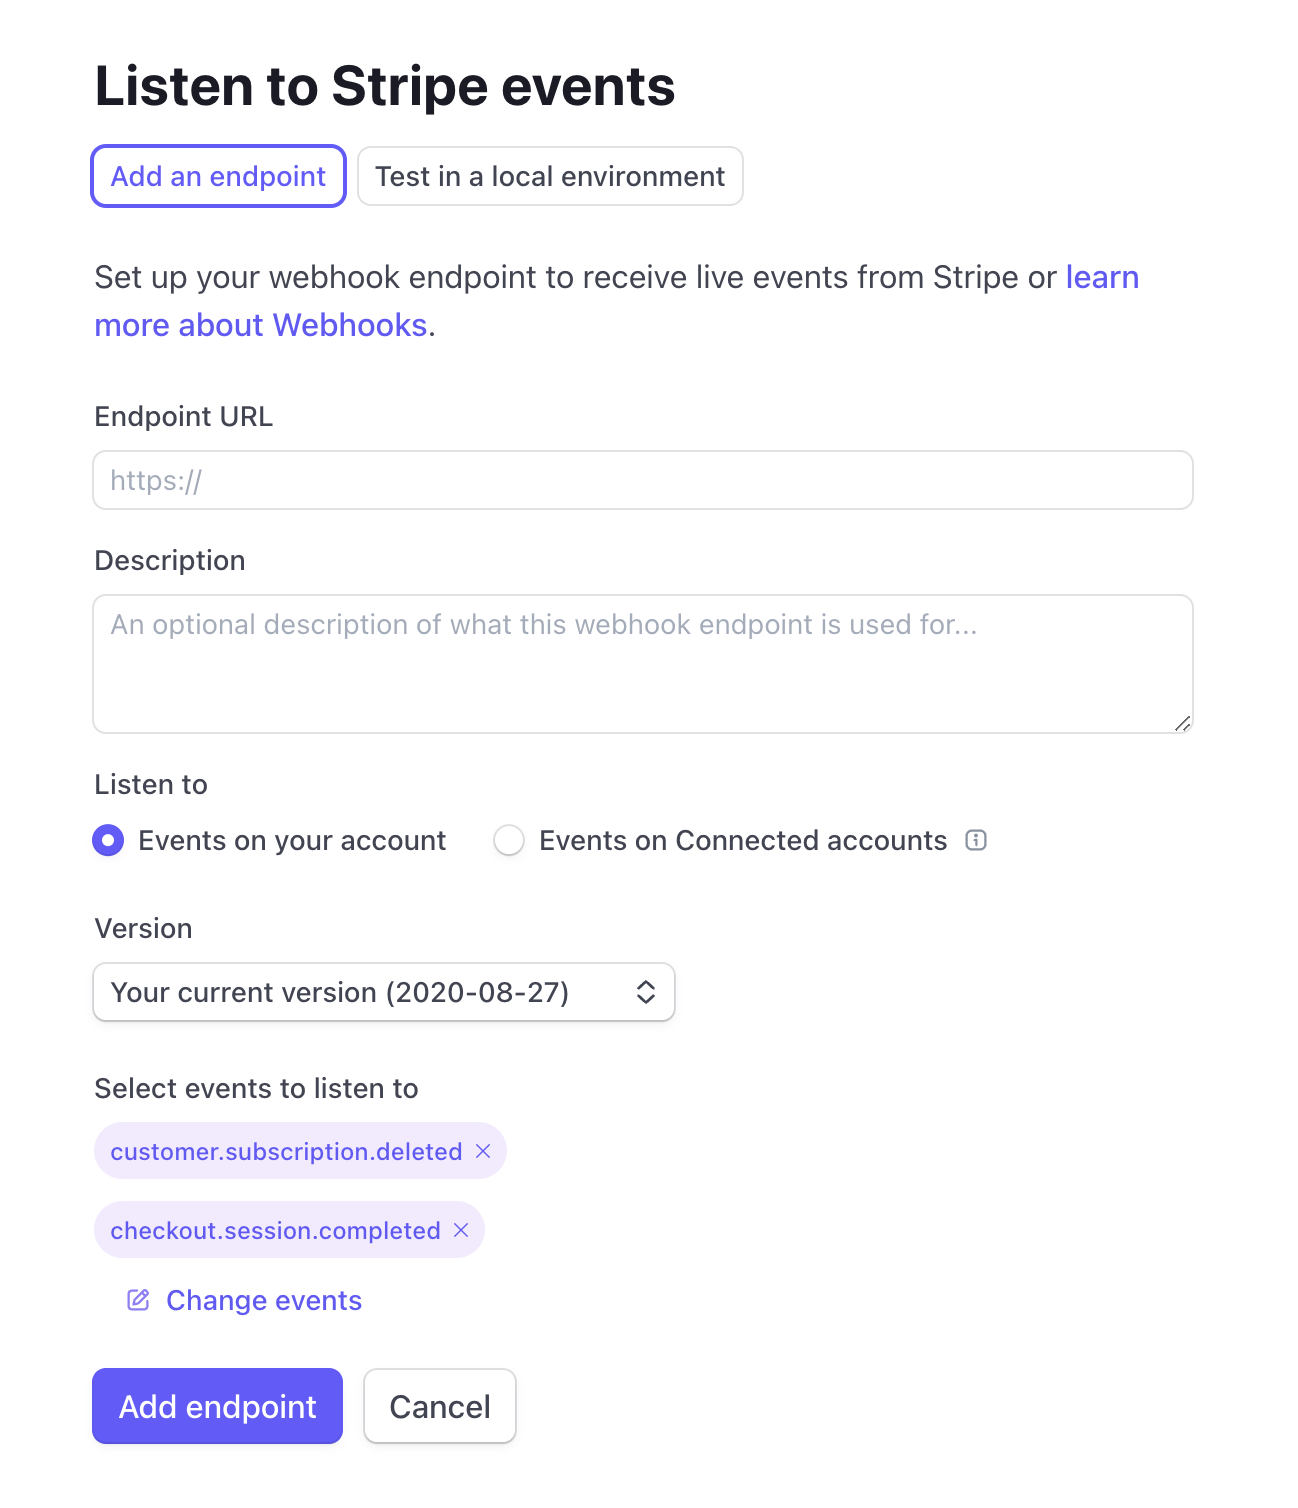
Stripe will now send an HTTP request to the provided URL with a payload body object containing metadata about either of the two events included when they occur.
Step 3: Add Plugin to StarbaseDB
For StarbaseDB to authenticate with Stripe we need to know two vital pieces of information that are provided via the Stripe dashboard – your API Secret Key and the Webhook Secret.
The first of two keys we need is your API Secret Key. Visit the link below and you should see a row for your "Secret Key” and a token value next to it. Copy and hold onto this token value for providing it to our plugin code.
Visit: https://dashboard.stripe.com/test/apikeys to get your Secret Key.
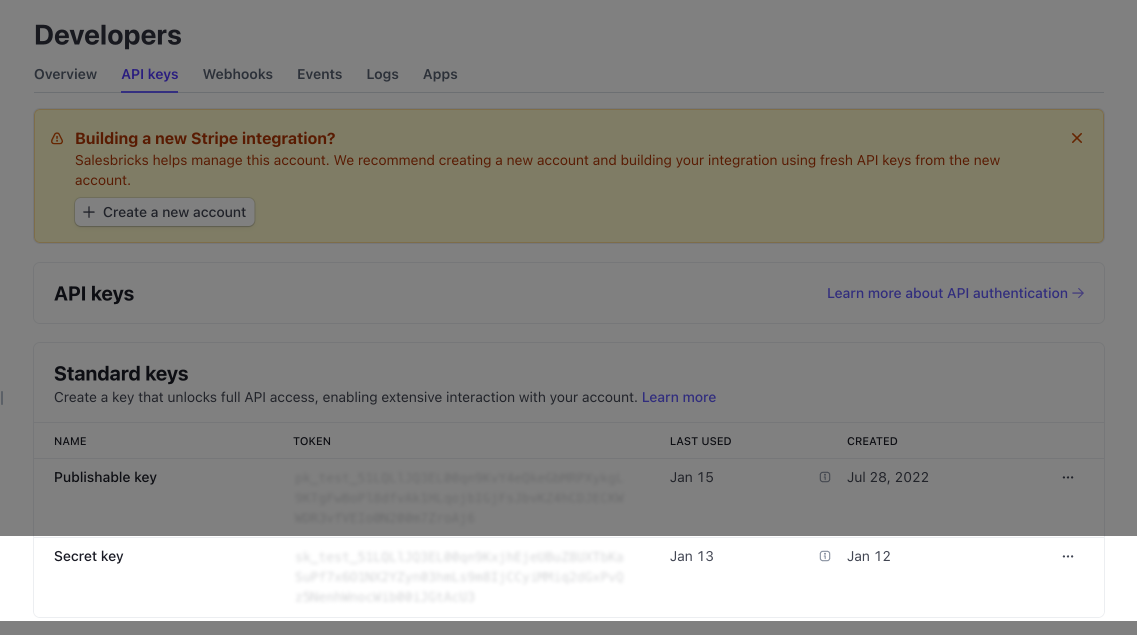
Next, click into your Webhook from the page link below and in the top section click “Reveal” for your signing secret. This will be our Webhook Secret you will use in the next step.
Visit: https://dashboard.stripe.com/test/webhooks

Finally – our time to shine very briefly in the StarbaseDB code. Inside the codebase if you open up the ./src/index.ts file you’ll find a place where we define an array of plugins that should be included in our deployment. Plugins allow us to easily extend and provide additional functionality on top of our database with little effort.
Define a new instance of the StripeSubscriptionPlugin with the two values we fetched from the Stripe dashboard a moment ago.
import { StripeSubscriptionPlugin } from './plugins/stripe'

// ...

const plugins = [
    // ... other plugins
    new StripeSubscriptionPlugin({
        stripeSecretKey: 'sk_test_**********',
        stripeWebhookSecret: 'whsec_**********',
    }),
] satisfies StarbasePlugin[]
And then it is worth mentioning after these changes we do need to deploy them. To deploy your changes you can run the following command in your Terminal:
npm run deploy
Step 4: Payment Link on your Website
Last step.. we’re almost there! Now we need to introduce the checkout button on our frontend project so users can click on it to start a subscription. We will need to create a Payment Link in Stripe from our product to create a hosted checkout page and then we need to include that link in our project.
First let’s create a Payment Link.
Visit: https://dashboard.stripe.com/test/products
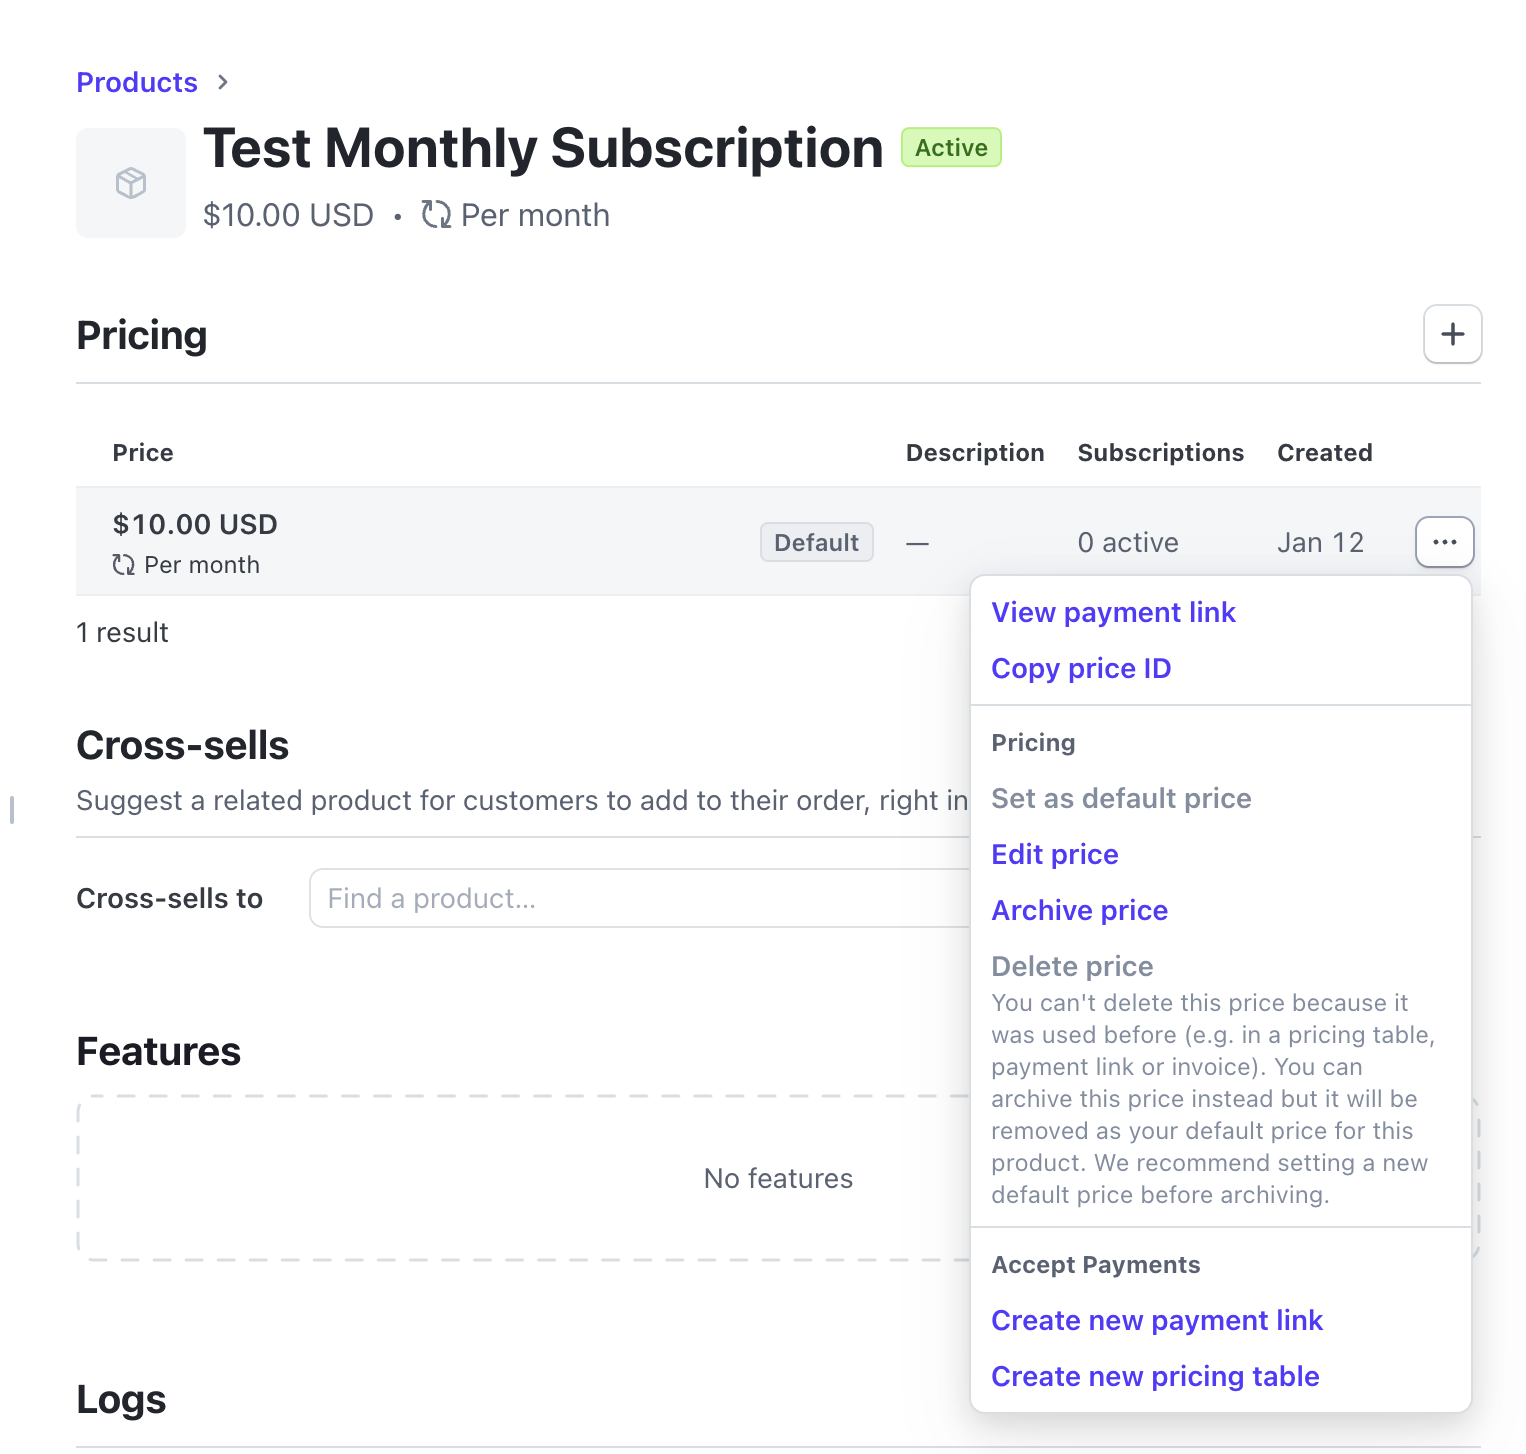
Next to the Price object click the “…” button
Click “Create new payment link”
On the next page at the top right click “Create link”
Now you have access to a payment link for your product. If you ever need to come back and view that payment link again you can:
Click the “…” button next to your product Price object
Click “View payment link”
And you will see the URL for it at the top of the following page.
Now let’s add that link to our frontend project. In the example below we are just putting an <a>…</a> href link to the Payment Link we just received. The only addition to it is we’re adding a query parameter for client_reference_id with your users userID value from your project just so you can adequately reference who is connected to which subscription.
userId value in the client_reference_id you can use any other unique ID value such as workspace, project, etc to reference the subscriber. It’s up to you!<body>
<a
href="https://buy.stripe.com/INSERT-SUBSCRIPTION-ID?client_reference_id=INSERT-USER-ID"
class="subscribe-button"
>
Subscribe
</a>
</body>
Load your HTML page or frontend project into your browser and when you click that link you should be redirected to the hosted Stripe page. If you were in Test Mode for the duration of the Stripe steps above you can checkout with a test card of 4242 4242 4242 4242 and an expiration date in the future and any 3 digit CVV code.
If you look at your StarbaseDB subscription table now you will see a new record appear indicating that the Stripe payment was received and attributed to the userId you mentioned in the client_reference_id query parameter!
Conclusion
We were able to successfully create a product in Stripe, tell Stripe to send two events to a webhook we provided when those events occur, add the plugin to our StarbaseDB instance, then put a link on our website and watch it magically work.
Most of the effort is spent in the Stripe dashboard itself, and only briefly in your code. Now any time a subscription is completed we will see the entry appear in our internal data source of StarbaseDB in the subscription table. If you were to go into the Stripe dashboard and cancel that subscription manually, the webhook will automatically handle updating the subscription entry in your database and mark it as deleted (or no longer active).
Spend more time building your product and let plugins handle the problems you shouldn’t have to. Until next time, that’s all from Star Command!
